Fine Homebuilding, while still far better than most of it's peers on the shelves next to it, is a shell of what it once was, and is clearly more oriented toward the Home Depot crowd. What was great about this magazine at one time was that they set the bar high and kept it there - something as a carpenter to strive for. But, at the same time the projects featured for the most part were obviously done in a manner that one would have to to make a living doing them. Half the projects featured now look like they were put together in a garage or warehouse just to take nice photos of them. There was just some guy that wrote an article on clear finishing exterior stained doors - I think he put 15 or more coats of clear finish on each side, with a 24 hour dry time between re-coats - are you kidding? Who has time or more importantly, money to pay someone for that? I use a professional finisher that sprays a four or five fast drying coats of clear finish on an exterior door, leaving an incredibly durable, glass smooth finish. He does it in a few hours and charges about $200.
Back to the ceiling - here is the finished product.
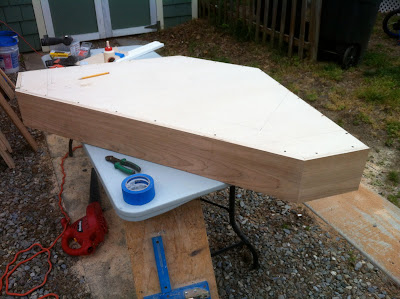
I built this last fall and the construction photos that follow are from this past weekend. The houses were the same model and the rooms identical in size. The rooms were 29'x17'. We built a nine section ceiling with a three layer crown molding on the interiors of the panels. Start to finish it took a crew of three of us, all professionals, about 22 hours to complete. (66 total man hours).
To start - the usuals - set up a cutting area outside, but as close to the room as possible. Stage your materials, move the furniture out of the room , cover the floor with tarps - taping them together and to the floor to hold up under the constant traffic. Then layout out your grid. You need to break out the calculators here and figure out your spacing and also determine the squareness of the room. The latter is important as you need to keep your grid precise and square, otherwise you will have a nightmare installing the box beams and later the trim. I layout the grid using in this case the 6" wide beams as the basis. There is also a 6" bean around the perimeter of the room - you will see later that the way I build this allows you to "absorb" the out of square walls here, without being very noticeable.
 |
| Ceiling laid out - Installing cleats |
Now that you have your grid, install your cleats. Since the beams are 6"x6" - the cleats should be 4 1/2" wide - we used cut off from building the boxes (more on this later) and around the perimeter of the room, thin cleats, about 1 1/2", cut off from ripping down the horizontals for the flat part of the beams. This conserves wood and uses up our scraps that normally would just be burned or thrown out. We use construction adhesive, finish nails to hold the cleats in place, and then go back and screw everything in place with 2" drywall screws. Always mark out the joists to nail and screw into - not just to secure everything, but also with all the modern systems hidden in walls like PEX piping and flexible gas lines, it's too easy to puncture something.
 |
| Building the boxes |
 |
| Start in the center |
 |
| Boxes up |


